Tools needed: measuring tape, pencil, hammer, nails, hats!
Blank space = room to create a pretty epic hat wall.
Here are some tips & tricks to creating the perfect hat wall at home.

Supplies: In our shops we have these super gorgeous walnut pegs for our hat walls, and they’re absolutely lovely. I wanted to go for ease so I just grabbed some 1.5” common nails from the hardware store. I knew I wanted the rows to look even but keeping in mind that not all the brims of my hats are the same, in fact they range from about 2.5” – 4” so that was something to note as well.
Vision: I began first by laying out all my hat styles on the floor and seeing what color stories came about. I had a few blue tinted hats, a couple darks, and a lot of light-colored wools. At first, I also wanted to organize them by crown shape or block. I figured out fairly quickly that with my personal collection I wasn’t going to be able to organize by both color and block so I went with color, as that seemed more important visually to me. I kept the lighter off-whites and tans together, and the blues, and then the darkest.
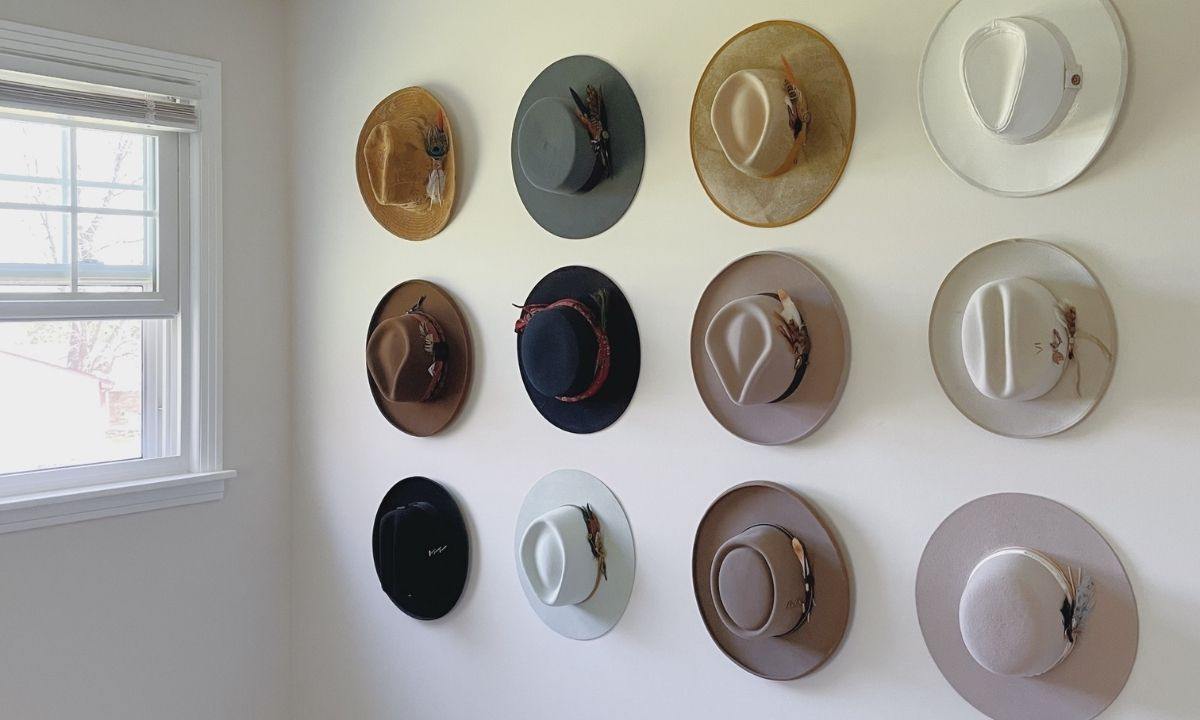
Measuring: After measuring out the space on the wall, I knew the best option was to do four columns of three hats each, getting me to my magic number 12. I began first with the top left hat. I made sure to have enough space from the corner to support the brim widths, and then I measured from the ceiling about 12” to try to keep it consistent across the wall. What I found the most helpful, was to hold the hat up where you want it on the wall, make a mark with pencil at the very top of the brim, and then the side brim.

Next, I flipped the hat over and measured from the top of the brim, to the inside sweatband, where the nail would be. That’s where I got the range of 2.5” – 4” because of various brim sizes. After getting that measurement, I measured from the top brim marking on the wall, whatever that measurement was, and then hammered in the nail below it.
After that, I considered the brim widths of the remaining hats for that column. I decided to go down column by column as opposed to by rows. The space between each hat in each column also varied depending on the brim sizes – anywhere from 2.75” – 4” between hats. The first column was the easiest, and then as you add more columns, that’s when it gets trickier with measurements versus what looks best visually from a distance, always considering the first column too.
I decided to try keep the spacing of columns consistent, since the spacing between each hat would vary. I kept 5” between each column of hats, edge to edge. I worked my way from top to bottom, left to right. It’s not perfect, but it was super easy, inexpensive, and looks great!

Follow us on IG here
Share:
Goorin Bros. x Spotify: SS21 No. 1